My wife suggested I make a parking garage to hold small Matchbox sized cars for our third grandson. I made a parking garage for our first grandson over ten years ago and have learned a lot about woodworking since then. So this garage will be more complex than its nine year-old cousin seen below.
The design has been percolating for a few weeks and has now crystallized. The garage will have three floors with ramps connecting the floors. The plan for ramp location is such that rolling the car down the top ramp will carry it to the second and then down a short ramp sending the car out the front of the garage. Situated between one ramp exit and next ramp entrance will be curves to 'steer' the car to the next ramp. These curves will be cut with the scroll saw and glued to the appropriate garage floor in the corners.
The plan is to also make the "cars". These cars will be the same approximate size as Matchbox cars, but will be made of wood and sport animals on their topsides. The animals will be cut out with the scroll saw and doweled to the car body. Brass rods will serve as axles and peened once the axles and wheels are in place. To help the cars navigate the curves between ramps, their corners will be radiused. This will require moving the wheels closer together than typical Matchbox cars, so they don't interfere with the corner radii sliding along the curves.
Dimensions have been determined for most of the required parts. The garage will have a top, middle floor, and bottom. the overall box dimensions will be 9" X 9 1/2" X 22". The ends will be attached between the top and bottom with dowels. The middle floor (1/4" thick instead of 1/2") will fit between dadoes in opposite sides. The back, also 1/4" thick, will fit in rabbets; top, bottom and sides. The front will will be a hinged board in two parts. These two parts will also be hinged so one can drop down and serve as a ramp to the top floor, when the front has been opened. The bottom floor will protrude 1/2" beyond the upper two floors to accomodate the front when closed. It will have both a notch to capture the ramp and a small ramp for an exiting car.

The photo of a front view of the planned garage is shown above. The upper view has the front removed and shows the locations of the ramps and blocks in the corners with unseen circular cuts to redirect the car to the next ramp. The block on the left of the second level runs from front to back in a semi-circle. The block on the right of the bottom level is a quarter circle and sits in the back corner as the ramp from middle to bottom is against the back wall.
The lower view focuses on the front of the box, which is split for a ramp leading to the top level. The joint for this split door will have matching curves to allow the the right side to pivot around the edge of the left side. It will also have hinges on the left so, when the ramp is up, the door can swing down to close.
The wood for the garage has been purchased, two 2' X 4' sheets, one of 1/2" birch plywood and a second of 1/4" birch plywood. I would love to start on this project, but the marquetry project in progress sits on top of the table saw.
The marquetry work is now complete and the table saw has been cleared. Time to get started on the Barnyard Garage. The parts for the garage are listed in the table below.
| Part | Wood | Size | Modifications |
|---|---|---|---|
| Top | 1/2" | 9" X 22" | Rabbet back edge |
| Middle | 1/4" | 8 3/4" X 21 1/2" | |
| Bottom | 1/2" | 9 1/2" X 22" | Rabbet back edge |
| Back | 1/4" | 8 1/2" X 21 1/2" | |
| 2 Sides | 1/2" | 9" X 8" | Rabbet back edges & dado |
| Front | 1/2" | 8" X 22" | Split & hinged |
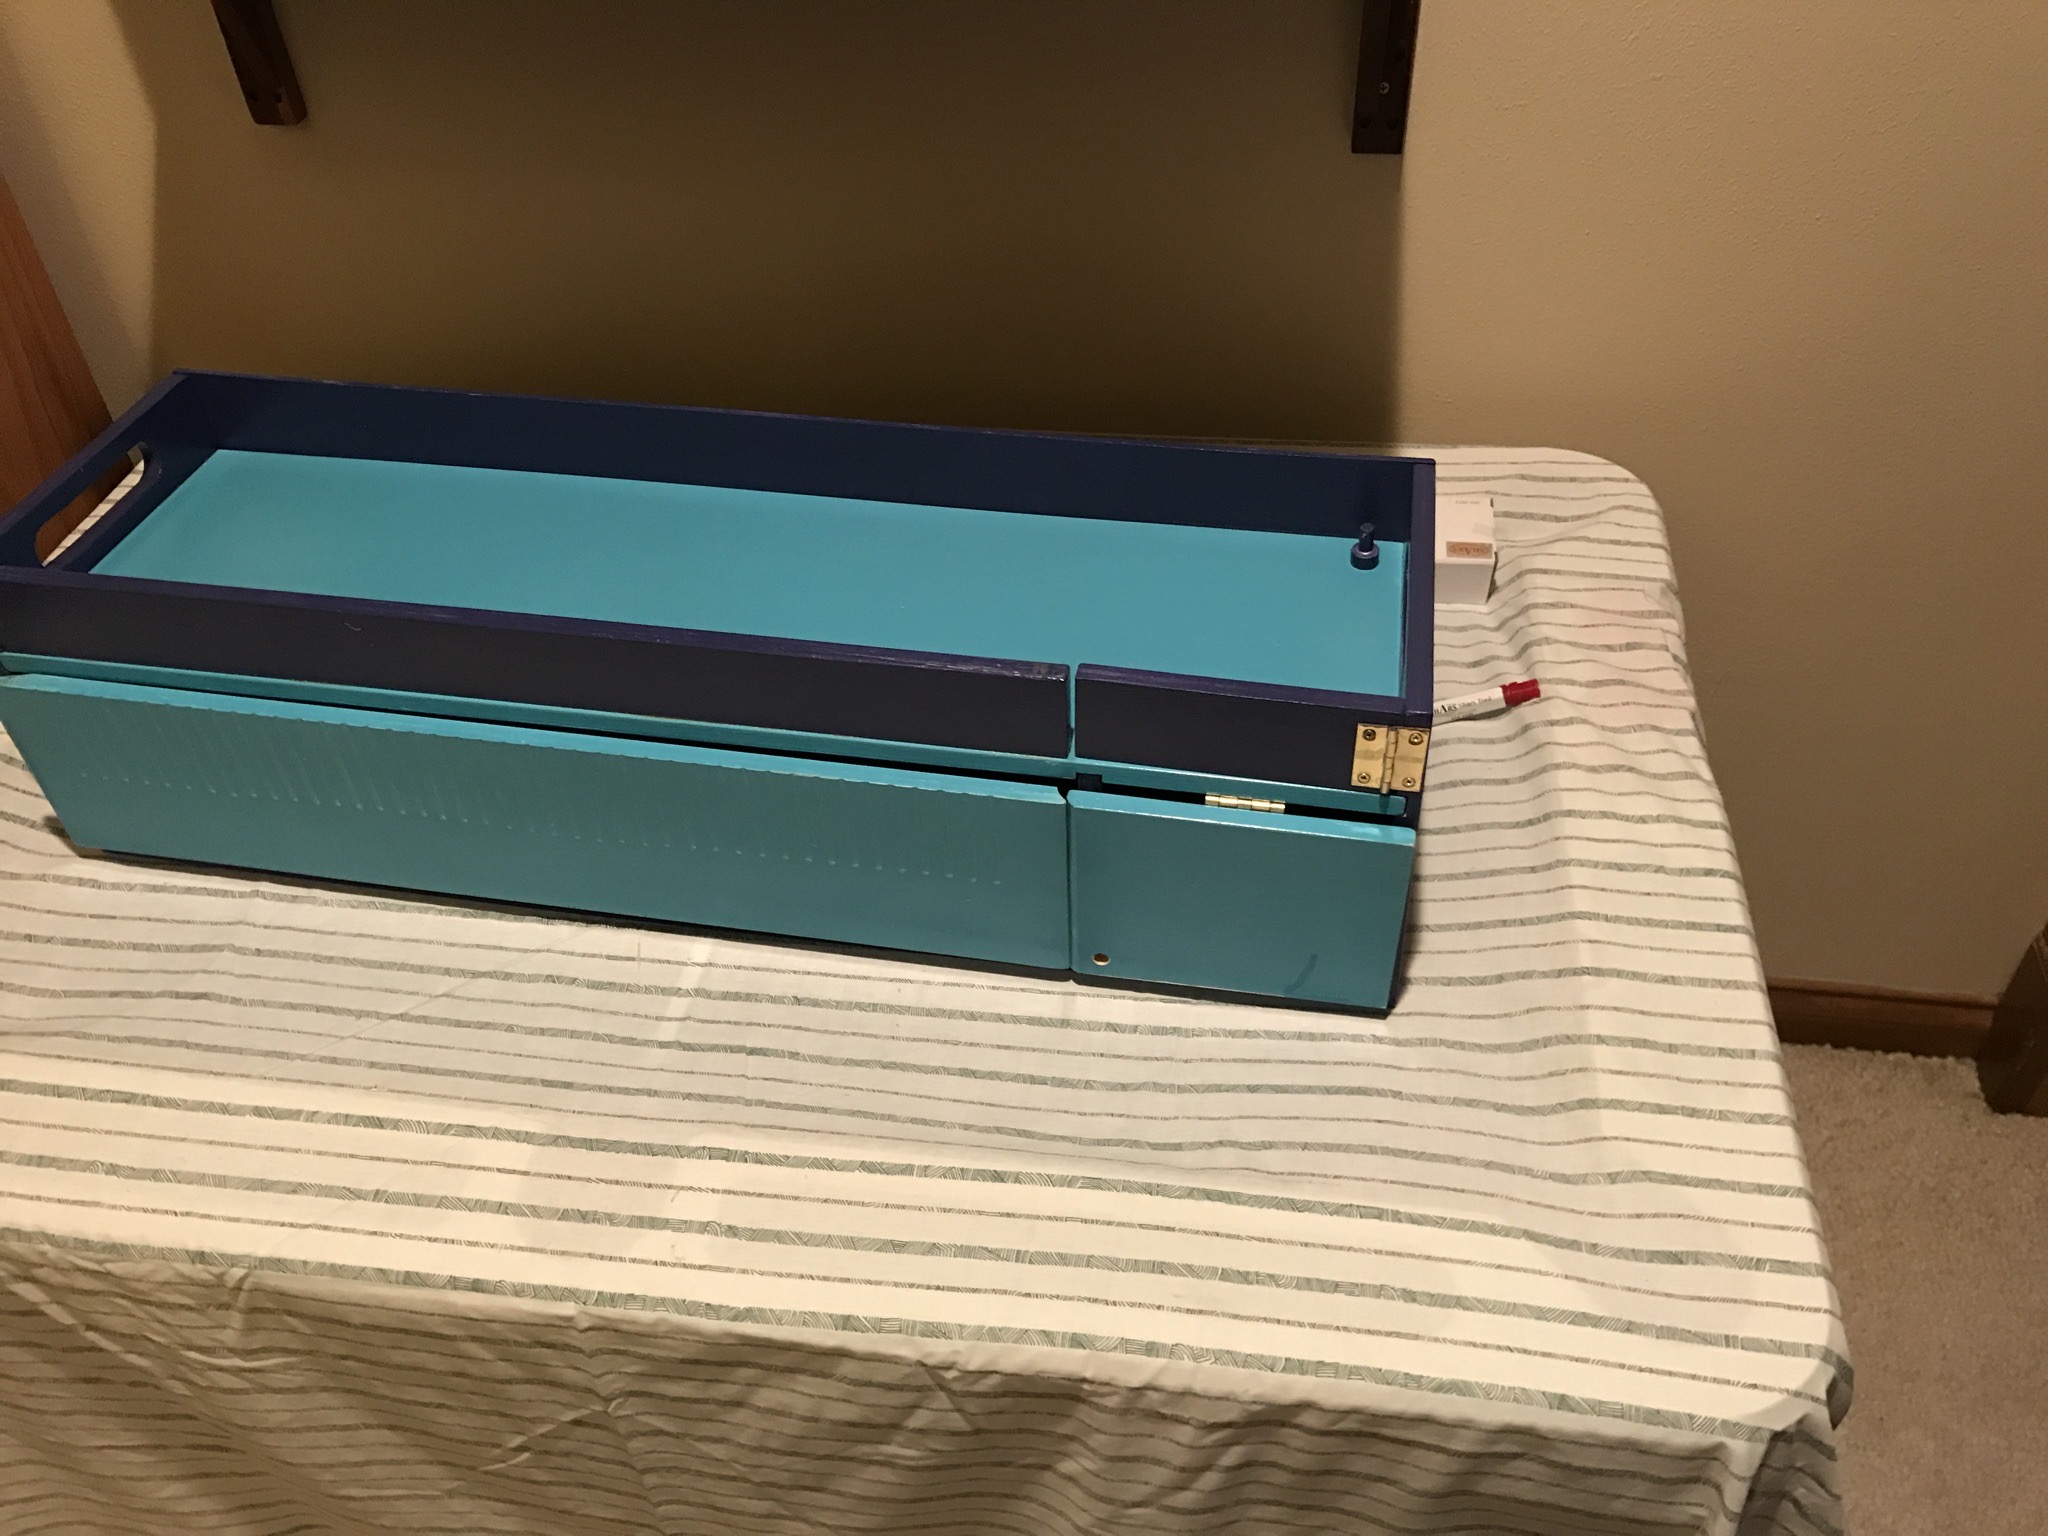
After a couple of hours on the table saw all of the boards are cut, rabbeted and dadoed as seen below. The second photo shows the box after dry assembly.


The tasks still to be completed on the box are as follows: cut holes in the top and middle, cut front and rout its mating edges, prepare ramps, make the car deflectors, drill for doweling, glue box together, paint, and attach front with hinges. Glue-up and painting will require more detailed planning.
The openings in the top and middle levels should be 2 3/4 X 5". The 5" length provides 2" of headroom for a car descending the ramp. The top opening is 3" from the right end and 1" from the front. The middle opening is 6 1/2" from the left wall and 1/2" from the back. Both will be cut with the scroll saw after drilling a holes in all four corners of each.
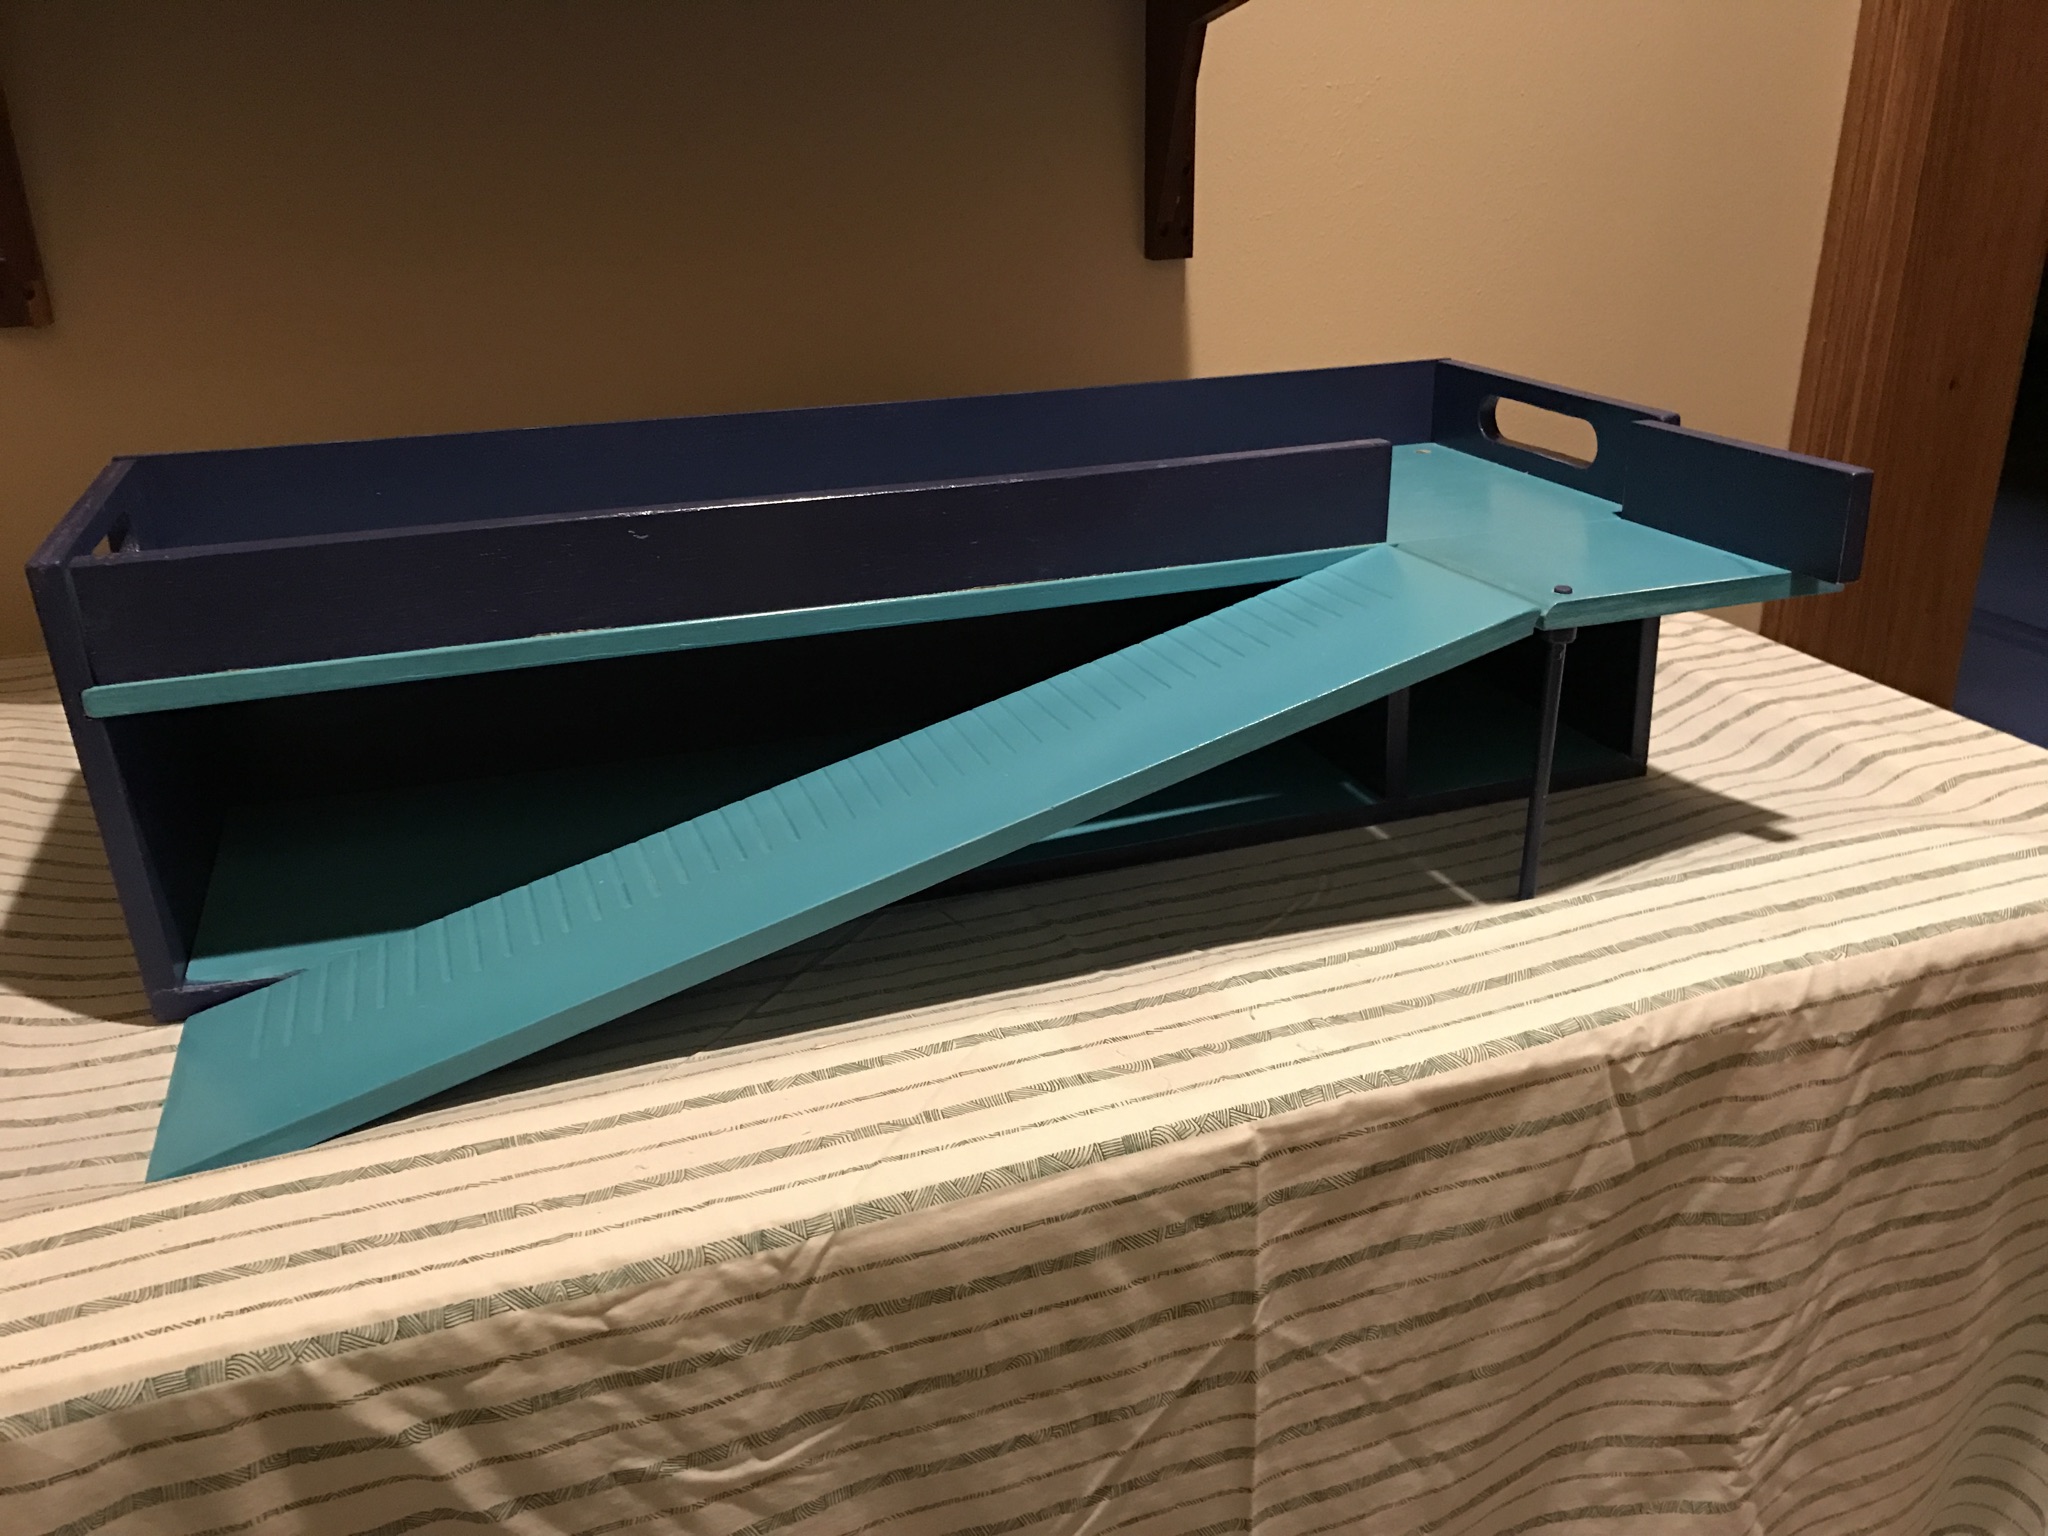
The holes were quickly cut on the scroll saw and the longest overhang fit easily within the throat of the saw. The doweling jig was pulled from the dusty shelf and used to spot and drill three dowels in each corner running from the sides into the top and bottom. The first photo below shows the rectangular openings in the top and middle levels. The second shows the dry assembled, doweled box.


The ramps were made next, 2 3/4" X 9" from 1/2" plywood. The boards were cut on the table saw and the ends were mitered. The top end of each was cut at 60° with the miter box. Some creativity was required to cut the bottom at 30° using the same 60° setup. This is seen in the first photo below. The second shows the two ramps with their mitered ends.


The middle shelf made of 1/4" plywood is warped, just enough to bother me every time I looked at it. A scrap of 3/4" pine was located, cut to 1/2" shorter than the shelf, and glued to the bottom of the shelf.

The curves in three corners of the garage were planned to turn the car coming down the ramps and steer it to the next ramp and out the front. At least that was the idea. To this end a 6" approximately square cutoff of 3/4" poplar was located. A 5 1/2" circle was drawn on the wood with a compass. The circle was cut out with the scroll saw. the four corners were then cut apart and sanded to soften the edges. The first photo shows the four curves and leftover wheel.

A test run was in order to best align the curves for directing the cars. A bit of double sided carpet tape was affixed to the upper ends of the two ramps and the ramps put in place. The curves were just set in place. Two Matchbox™ and one HotWheels™ cars were pulled from the bucket of my kid's cars. The garage with all parts in place is shown below. The result of rolling the car down the ramp—it hits the curve and comes to a dead stop. If perfectly aligned it will make the first turn, but not have sufficient momentum to pass through the second. Now I understand why tracks made for these cars are narrow with guide rails. The ramps will stay, but the curves are a no go. I will consider repurposing the wheel for a decoration or feature of the garage.

Focus shifted to the door/ramp on the front of the garage. The plan was simplified as it was considered. The front was cut in two at four inches from the left end. The table saw blade was set to 15 1/2° and both of the newly cut ends were chamfered (seen in the first photo below). A wide hinge was installed on the bottom of the 4" wide board and then attached to the underside of the top. Two small hinges were attached to the ramp and then fixed to the 4" wide section. The second photo below shows the hinged parts closed, while the third shows them in the open configuration.


A notch needed to be cut in the bottom for the open ramp to reside. The bottom was marked at the end of the open ramp. The notch was marked out with a 30° left side and a 60° right. The notch was chiseled out of the bottom extending 1/2" into the board. The photo below shows the ramp sitting in the notch.

All of the box insides were sanded with 150 grit sand paper using the orbital sander. The box was then glued together, glue in the dowel holes and along the edges of the two sides. The box was clamped and left overnight. The back no longer fits as the bottom of the box is slightly warped to the inside. An eighth of an inch was removed and the back glued into place in the rabbets. Both glueups are seen below, using two cauls in the widest part of the back glueup to spread the pressure.


The box was sanded and all corners rounded. The middle shelf was glued in place and then the two ramps were glued, one using blocks of wood and a wedge to hold it tightly in place. The final bit of gluing was on the back side, where the rabbets left four 1/4" cubic holes in the corners. A scrap of 1/4" plywood was cut into bits and each of the holes was plugged. These plugs were then sanded flush to the box sides and back. The box is now ready for painting.
Decided on one further change prior to painting. The door/ramp when open and sitting in the chiseled slot is far from sitting flat enough to drive a car up. Consequently, the lower end was cut at a 30° angle by tilting the table saw blade 30° and running the ramp through while held vertically. This mod necessitated a change to the cut notch. For the ramp to sit flat on this new beveled edge, a small section of the ramp needed to be removed. This area was marked and removed with a small hand saw. The ramp was then situated adjacent to the garage floor and the latter marked for a new notch. This was chiseled out. The cut off portion of the ramp had the needed 30° angle and was used to fill the previously cut notch. The new notch, the trimmed ramp and the glued in patch, all needing sanding, can be seen in the photo below.

After a final once over with a sanding block the garage was primed. This painting resulted in an additional light sanding, especially on the plywood edges. The garage-barn is now ready for final painting. The sides will be painted red, the top green, and the inside tbd.

After a trip to Menard's painting was initiated. The sides and door were painted with Rustoleum's Colonial Red. The overstroking was purposeful to get a more rustic appearance, which I quickly tired of and added a second coat. After some drying time the back and door edges were also be painted the same red. With tape in place the top and the upper ramp were both painted Hunter Green. The painted box is shown below after removing the painter's tape. As can be seen in the photo, the green ran beyond the tape (!?!) so the top was taped and the red reapplied to the top edge.


With the painting completed attention was focused on a sign for the garage. The garage will be called "Barnyard Garage". After locating the desired font the name was printed in large letters and then traced onto tracing paper as seen below. The original plan was to transfer the two words to the front door with carbon paper and fill with black, either Sharpie or paint. The shifted transfer over the original letters suggests a slightly different path with a 3D effect.

A few experiments were in order, so a scrap of plywood was sanded and painted red. While this dried the words were transfered to the red door. The photo below shows the result, almost as hard to see with my eyes as it is in the photo and that is after going over the lines multiple times.

The painted scrap had two B's transfered. Both were drawn over with an extra fine Sharpie marker. The first was filled in with a wide Sharpie. The second was filled with Reeves mars black acrylic paint. I preferred the painting to the Sharpie, but will await the paint drying prior to making a decision on the path forward. Definitely, prefer the acrylic, glossy and not so flat looking.

And here is the same acrylic B after shifting the tracing paper, tracing, and filling with a Sharpie silver metallic marker. The more I look at it the more I like it. The letters on the garage door were filled in as shown in the second photo; not too bad. I quickly learned that the law of diminishing returns strictly applies to fixing painting mistakes.


My wife when looking at the garage suggested painting grass around the bottom of the garage, a great idea and I already possess the perfect green paint. The suggestion was quickly implemented as shown in this photo of the back side of the barn with its impressionistic weeds.

While waiting for the temp to warm and let me get to Menards, two chores were completed. The title on the garage needs to be given the 3D effect. This was accomplished by reusing the original tracing, shifted up and to the left. After tracing the new letter outlines. the gaps were filled in with silver Sharpie marker. The first photo below shows the improved characters. The second photo shows the weeds extended to the front of the garage along with a few flowers, must be dandelions.

